My first computer build: Part 5 - Finale
It took much longer than I ever thought possible to reach this point, but we are finally here! Through the four parts of this series (1, 2, 3, and 4), I have walked you through all what I had to learn in order to make an educated choice about all the components of my first computer build. In this last installment, we will take a look at how the different components all came together, as well as the final remarks I have about the build.
The final components list
| Component | Model |
|---|---|
| CPU | AMD Ryzen 9 5900X |
| Motherboard | MSI MEG X570 Unify |
| CPU cooler | Bequiet! Dark Rock Pro 4 |
| Case | Fractal Design Meshify 2 Compact |
| Memory | Corsair VENGEANCE® LPX 64GB (2 x 32GB) |
| GPU | PowerColor Fighter RX 6600XT |
| PSU | Bequiet! Straight Power 11 1200W Platinum |
| Storage | 1TB Samsung 970 Evo Plus M.2 2280 PCIe 3.0 x4 |
Table 1 contains a list of the components of my build, as settled upon throughout this series. Before moving further, here are a couple things worth mentioning:
- The last line mentions the storage solution I ended up choosing. This is a component I have not covered in any part of this series. I did look into the different characteristics which can make or break one’s choice of an SSD. However, my takeaways weren’t really anything worth writing about. At the end, it really was a matter of choosing the article with the best reviews online.
- Additionally, as mentioned earlier in Part 4, I had settled on only finding a host GPU for my build, leaving the search for a guest GPU for my PCI-passthrough setup for a time when GPU prices would return to normal.
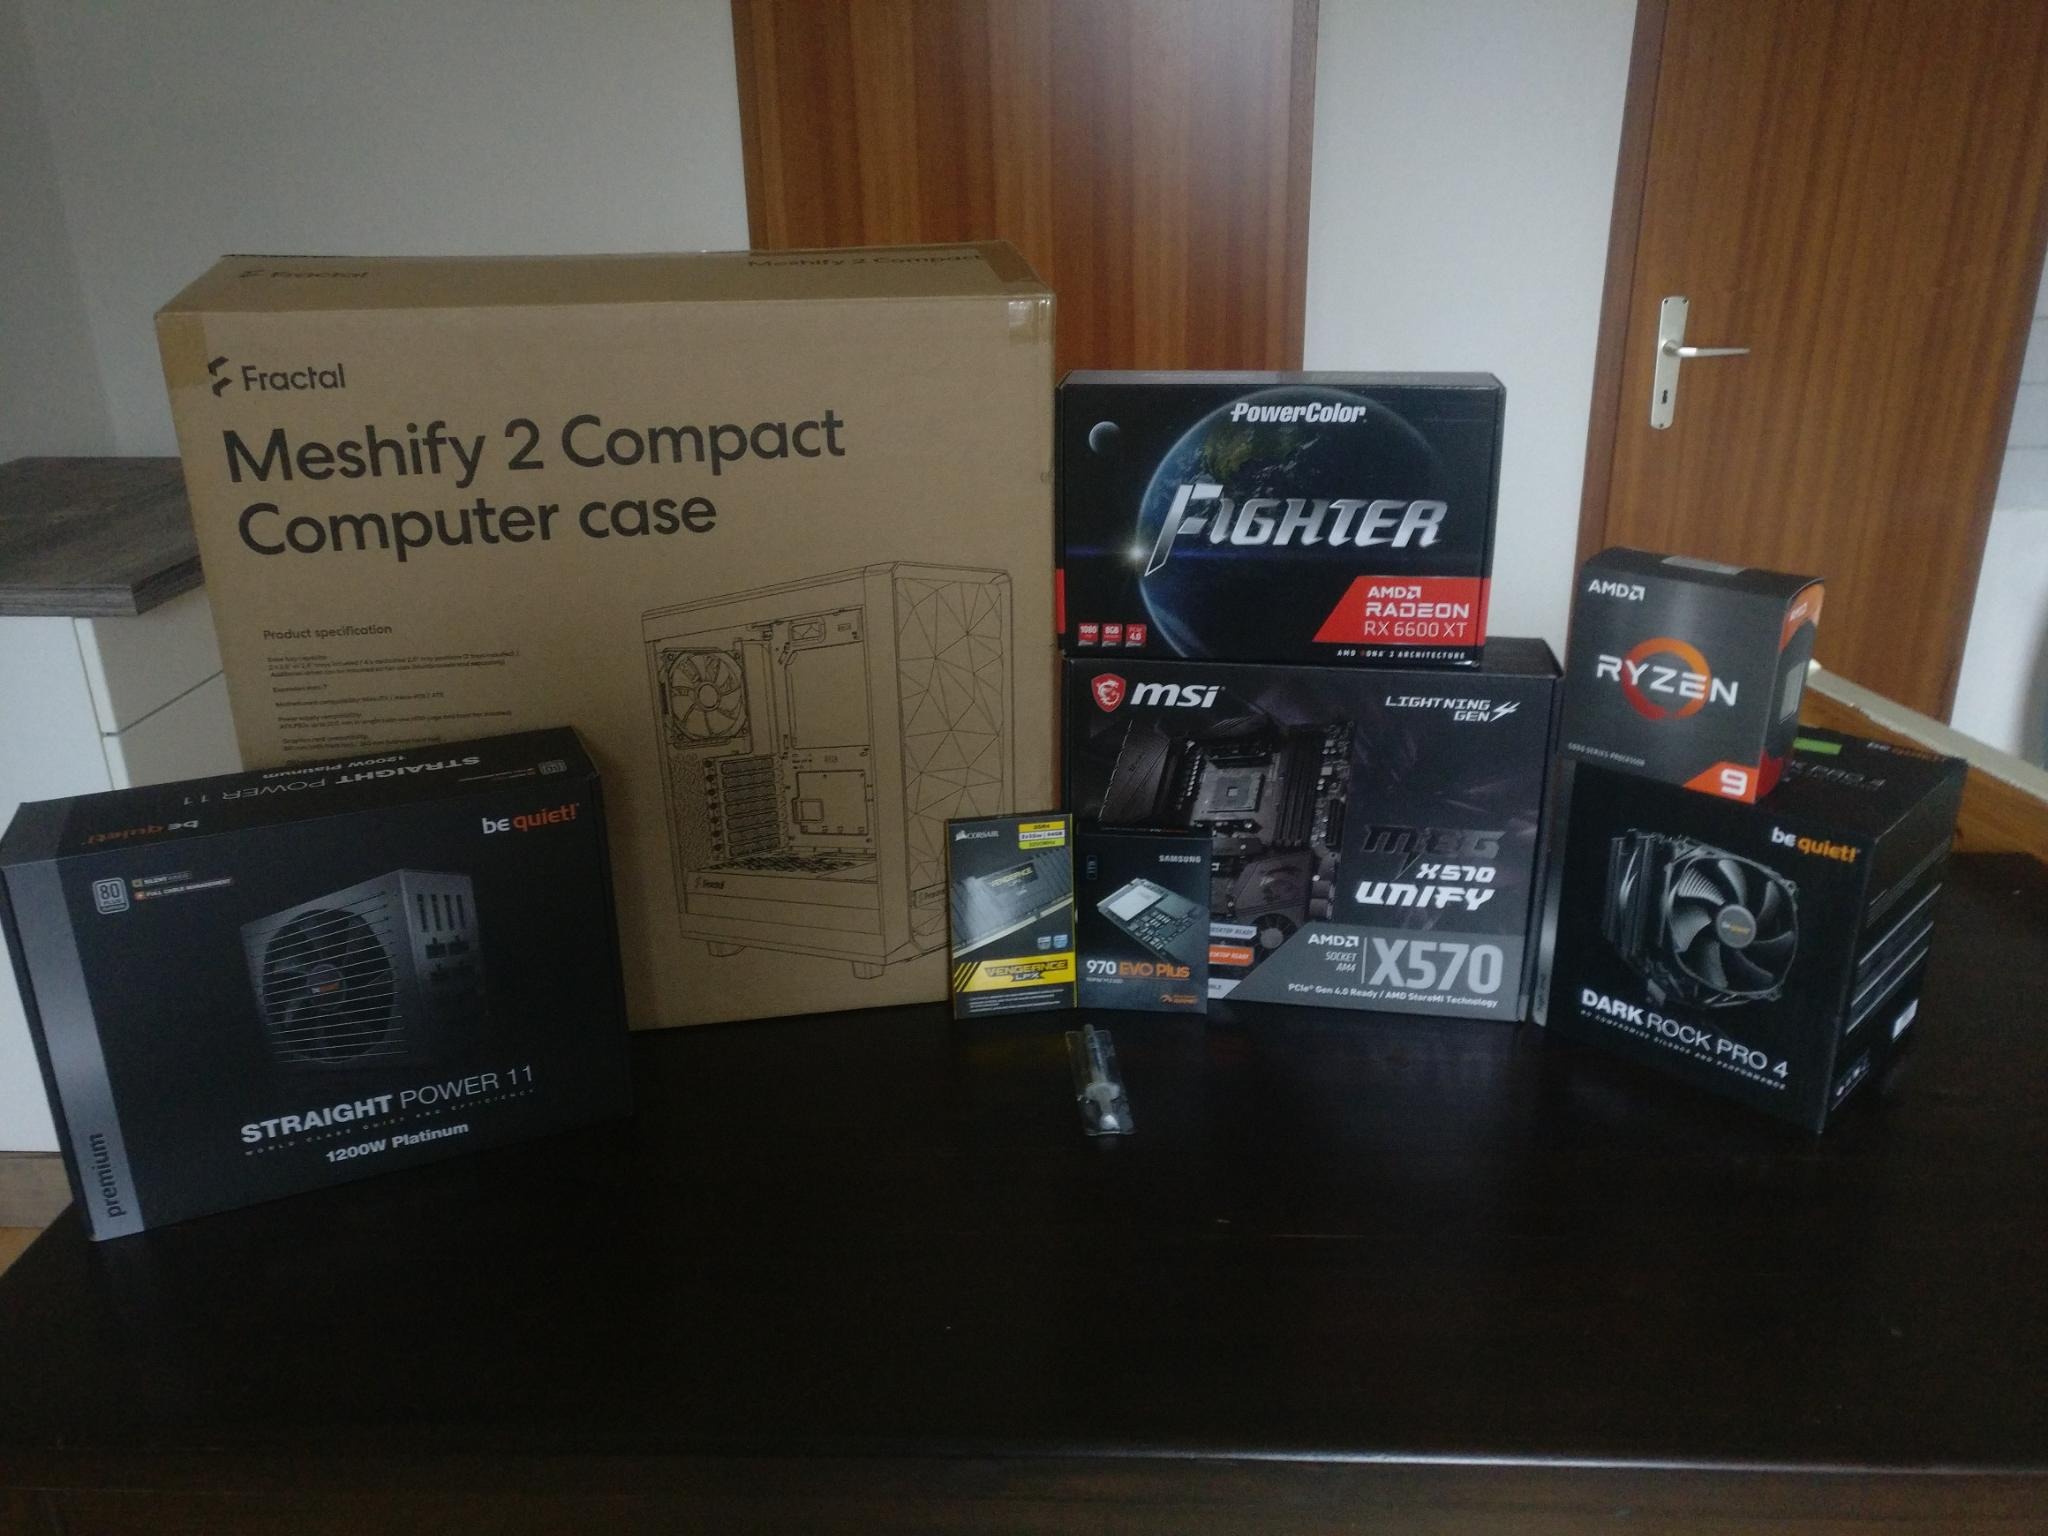
With the list of components now ready, the next thing to do was simply to order everything. Figure 1 shows all the build components. Having spent months gathering information about each component, it felt a bit surreal having them all gathered at last.
 Figure 1: All the components of the build
The Build
The build process itself was easier than expected. A couple notable things though:
- The fins on the Bequiet! Dark Rock Pro 4 CPU cooler are actually pretty sharp, and I managed to get a mean cut on my finger while handling it.
- There seems to be a slight misalignment of the back-plate of the MSI MEG X570 Unify motherboard. I checked, double and triple checked, and I don’t think that I have somehow falsely mounted the motherboard in the case (the mounting peg would not have allowed it anyway). Additionally, looking around online, multiple people seem to have faced the same problem with this motherboard (See archived: 1 and 2). It’s not a huge issue, more of an aesthetic one, and considering that I will almost never see the backplate, I opted to simply ignore the issue.
- As covered in the last installment of this series, the Fractal Design Meshify 2 Compact advertises a PSU maximum length of 165mm with the HDD cage in place, and 200mm without it. The Bequiet! Straight Power 11 1200W Platinum PSU I decided to go with being 170mm long meant I would need to remove the HDD cage. However, looking online, I found that it was possible to fit longer PSUs in the case than advertised while keeping the HDD cage. This could be achieved by pushing the HDD cage to the front of the case. The downsize being, that this would allow to only mount two 140mm fans on the front at most, instead of the maximum allowed three 120mm fans (see 1). However, attempting this resulted in a very cluttered cabling, so I opted to simply remove the cage.
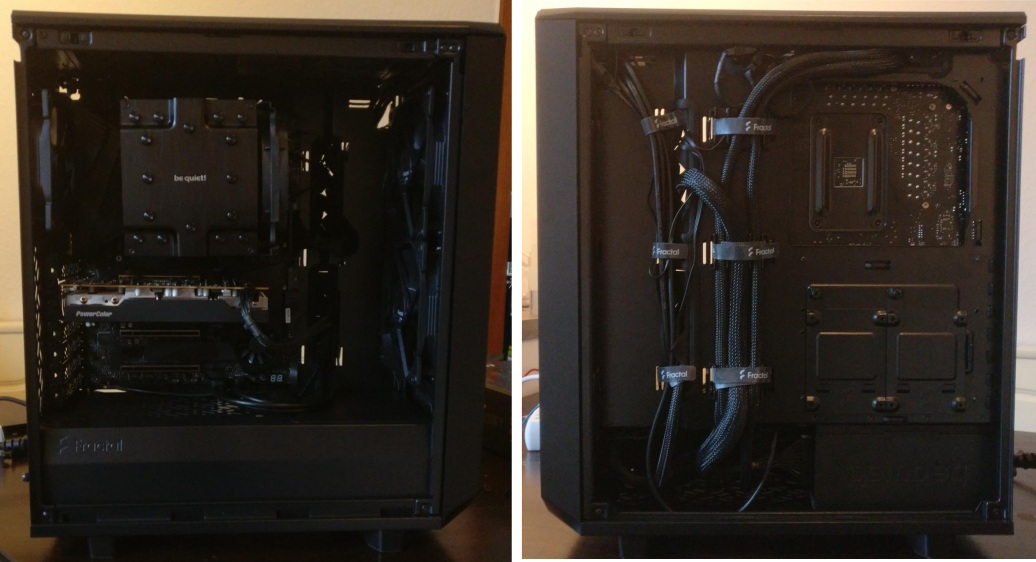
Figure 2 shows my finished build. As shown in the pictures, the Fractal Design Meshify 2 Compact allows for good cable management.
From this point on, all that was left was installing the OS, and getting on with configuring it up. I am not covering those steps here. However, you can check my Attempting to explain the difference between BIOS and UEFI article, which covers some of the notions required during the first step of such a process. Namely, dealing with the firmware.
 Figure 2: Finished build: front (left), back (right)
Retrospective
Most of what I have written in the different parts of this series, comes from notes I had made for myself during the early research I had conducted into the different components of my build. However, some of the more advanced nuances I have covered were not initially clear to me. It was only after I had to more clearly flesh out my thoughts in writing, that I gained a better understanding of them. As such, thanks to this added knowledge, I now view some of my picks in a different light than I initially did. In the following is my opinion in retrospect, about some of the components I have settled on.
- CPU: During the write-up of this series, a new generation of AMD CPUs (Ryzen 7000) was released. This new generation is built upon the new Zen4 architecture. The main advantages are higher boost frequencies, better power efficiency, more cache and a more mature 7nm process. However, this new generation uses a new socket (AM5) along with new chipsets (B650 and X670). This means that upgrading to this new generation would require a new motherboard.
It is a bit of a shame that I only “jumped on the Ryzen hype train” as AMD was moving into a new socket after four generations (!) of support of the AM4 socket. However, upgrading is definitely not something I am considering right now. In fact I am happy with my CPU choice, and believe it will serve me well for years to come. Furthermore, if I do ever feel the need for more horsepower in my setup, my AM4 motherboard still allows me to upgrade my current Ryzen 5900X (12 cores, 24 threads) to a 5950X (16 cores, 32 threads). - Motherboard: Here, things are less straight forward. Back in Part 2, I opted for the MSI MEG X570 Unify instead of the GIGABYTE X570 AORUS Master. On the one hand, the overheating issues some people were reporting and the uncertainty of getting a board with a revision where this issue was not fixed were serious problems I did not want to deal with. However, since finishing my build, I have started playing with virtualization a bit, and I am already realizing the benefit that having more USB ports and an additional networking port would bring. Nevertheless, I have nothing bad to say about the MSI MEG X570 Unify (other than the slight back-plate misalignment issue I have mentioned earlier), and it is serving me very well.
- Memory: as highlighted in Part 3, the only reason I went with my final choice for the memory instead of the runner-up was the price. However, having learned more about the topic since then, I believe it would have been worth paying for the extra speed and lower latency. On the plus side, the latest generation of CPUs (from both Intel and AMD) now support DDR5 memory, meaning DDR4 (which is the fastest my board supports) will only get cheaper in the future. I will be keeping this as a possible upgrade path for my build.
Conclusions
I have been using my build as a daily driver for quite some time now. I still have not had time to test its full potential under all the scenarios I have listed in the introduction of this series. However, so far I have been very happy with the end product.
Originally, I had planned to cover all the different components of the build in a single article. It goes without saying that, that was a bit too optimistic of me. Articles kept getting longer, and I kept having trouble finding the line between what was worth mentioning and what was not. However, documenting this whole process has helped me build a better understanding of multiple concepts which I would not have delved into had I not had to write about them. I do have plans for future build projects, and plan on covering those in a more brief manner.
As for now, I have a couple of “less-hardware oriented” projects which I have put on hold for a long time, and on which I can finally advance thanks to my brand new system. I will be reporting on those next, so stay tuned!